blog
How to Backup Your Amazon RDS for MySQL and Restore on Your Own Server

Amazon Relational Database Service (Amazon RDS) is a web service to create and operate relational databases online. With this service, you get to automate time-consuming tasks like hardware configuration, database setup, or patch deployment.
Amazon RDS gives the following benefits to its users:
- You get to manage and scale hardware components separately because Amazon RDS is split from the hardware setup.
- Amazon RDS services are bundled with monitoring, backup, and recovery features.
- It supports known databases like MySQL, MariaDB, PostgreSQL, Oracle, Microsoft SQL Server.
- Supports high availability with its primary instance and a synchronous secondary instance for failover when there is a problem.
- Includes AWS Identity and Access Management (IAM) that is used to define users and permissions for access security.
The basic building block for the Amazon RDS is a DB instance which runs on an isolated database environment running on the cloud. Each DB instance runs on a DB engine specific to particular database technology. Likewise, the features and behaviour vary based on the DB engine. AWS Command Line Interface, the Amazon RDS API, or the AWS Management Console can be used to create or modify a DB instance. Each DB instance has a minimum and maximum storage requirements depending on the storage type and the database engine it supports.
This blog gives you an overview of Amazon RDS and creating a MySQL database instance on it. The next section of the blogs shows you detailed steps on how to use Backup Ninja to backup MySQL database on Amazon RDS.
MySQL Database on Amazon RDS
Amazon RDS for MySQL allows you to create a MySQL database instance in minutes with configurable hardware capacity. It automates time-consuming database administration tasks, allowing you to have more time and resources for application development. Amazon RDS supports DB instances running several versions of MySQL including the MySQL Community Edition versions 5.5, 5.6, 5.7, and 8.0 which is widely used by many applications.
Creating MySQL Database Instance on Amazon RDS
To create a MySQL DB instance on Amazon RDS, you need to follow simple on-screen steps using the AWS Management Console. If you are new to Amazon RDS, you can create the instance on the Free Tier and experiment with it for free. AWS free tier gives you 750 hours for RDS with single availability zone, db.t2.micro instance with database engine MySQL, MariaDB, PostgreSQL, Oracle BYOL, or SQL Server (SQL Server Express Edition), 20 GB of General Purpose (SSD) DB Storage, and 20 GB of backup storage for your automated database backups.
Following are the summary steps to create a MySQL database instance on Amazon RDS Free Tier using Amazon RDS Console:
- Select the region where you want to create the database instance.
- Choose the MySQL icon and the free template.
- Configure the database instance parameters. Here you will be able to set the instance password and settings for configuration.
- Configure the connectivity information that RDS needs to launch the MySQL DB instance.
- View the created database instance.
For detailed steps with screenshots, refer to the official tutorial provided in the AWS documentation.
Amazon RDS MySQL Backups Using Backup Ninja
Backup Ninja is a backup service for you to take backups for open source databases, files, and directories in an automated way. It supports backup for leading open source databases like MySQL, MariaDB, Percona, TimescaleDB, MongoDB, and PostgreSQL at its native method. You get to save these backups locally or on any cloud provider securely in your preferred region. Backup Ninja allows you to centrally monitor multiple servers with different database technologies backups using a single console. With its dynamic and interactive dashboard and notification system, you will never miss a single backup event processed on your server.
Installing Backup Ninja Agent on Your Server
To schedule backups on Backup Ninja, you will need to install the agent on your server. This agent will then communicate with your database and take backups according to the backup schedule you have created. For security purposes, Backup Ninja does not store any security keys and uses advanced encryption algorithms to protect your backup. Following are the simple steps to install the Backup Ninja agent on your server.
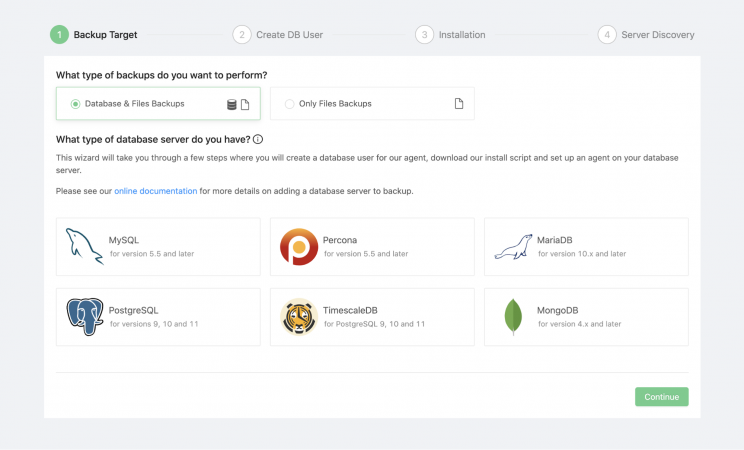
Step 1: Set your backup target
In the first step, you need to decide the type of backup you would like to have. You can either choose to backup and restore or only the backup option where you can always edit and add in the restore option. Next, select the database technology and the version. The version selection is enabled when you select the database server type here.
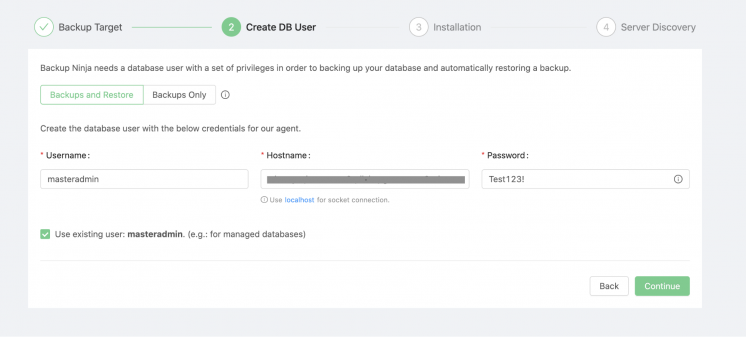
Step 2: Creating a Database User
Backup Ninja requires a database user with the privilege to backup and restore the database. For a managed database, click on the checkbox below to use the existing user to manage the database backups. Fill in the hostname, which could be the endpoint or an IP address, and the password and proceed to the next step.
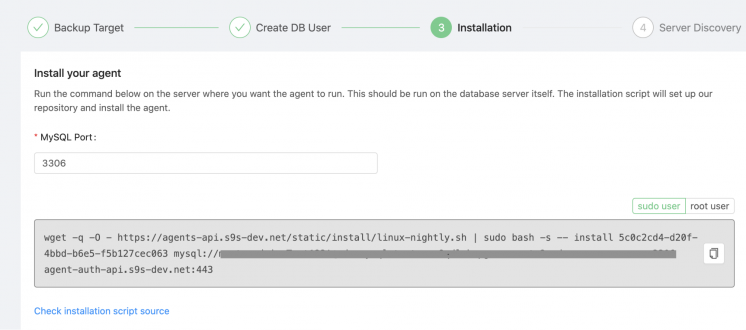
Step 3: Install the Backup Ninja Agent
To install the agent, you will need to copy and execute the installation script on the server.
Step 4: Server Discovery
Once the installation is complete, the server will be discovered automatically and displayed on the screen.

You will see the discovered server added to the list of servers in the Servers listing page.

The next sections show you how to schedule backups for a MySQL database instance on Amazon RDS.
Scheduling Amazon RDS MySQL Database Backup Using Backup Ninja
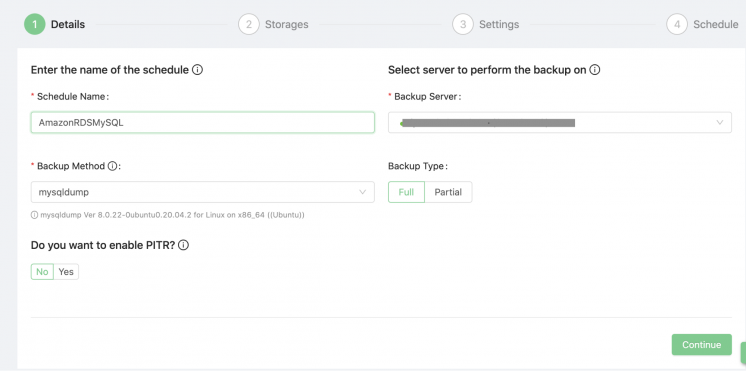
Step 1: Complete the schedule details
Give a name for the backup schedule and select the server you want to backup. The backup method will list the backup tools installed in the server automatically. Backup type allows you to choose either a full or partial backup type.
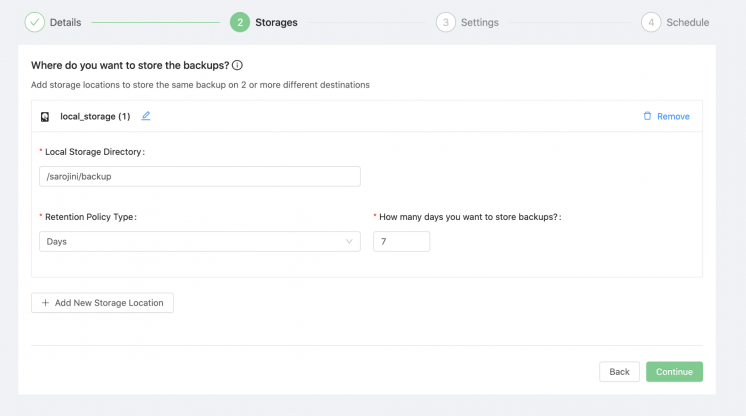
Step 2: Configure the backup storage
Next select where you would like to store the backup. You can have a combination of local and cloud storage configured on the same screen. If you would like to add more storage locations, simply click on the Add New Storage button and fill in the next storage location. Retention here is the duration of how long you would want to keep the backup.
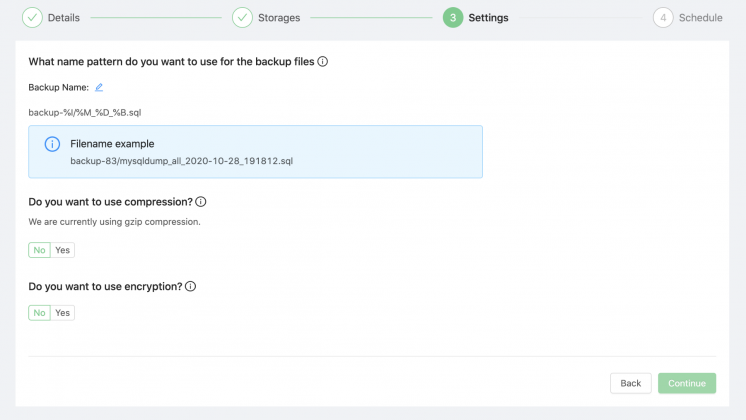
Step 3: Backup name, compression, and encryption setting
Give a name to your backup, or you can choose to leave it at the default setting. If you are concerned about the backup size, enable the compression toggle and the backup will be compressed using the gzip compression. You can also enable the encryption to have encrypted backups.
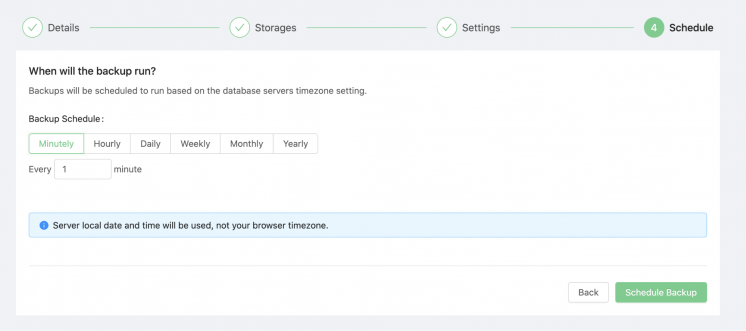
Step 4: Set the backup frequency.
The last step is to set the frequency of the backup task, and the backups will be scheduled to run according to the database server settings.
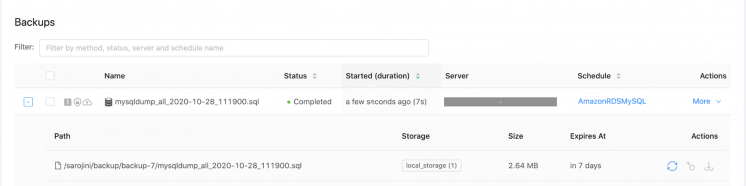
View the created schedule on the scheduled listing. Click on the play button to start or pause the schedule.

You can view the status of the scheduled backups on the Backup page. Here, the listing will show you the status of the backup, the storage location, and its size, which will be easier for you to retrieve at any point of time.
Conclusion
Amazon RDS for MySQL is an excellent service if you are looking for a hassle-free MySQL deployment and free up internal resources on time and resource consuming tasks including backups, software patching, monitoring, scaling, and replication. Also, It saves the cost on- premises infrastructure maintenance and upgrades. Suppose you have concerns about the growing cost of storage or infrastructure on the AWS environment. In that case, you can always opt to have alternative backups using solutions like Backup Ninja to take a safe and encrypted automated backup stored on your preferred location.