ClusterControl
Fully automate your highly available open-source and proprietary database operations on-premise, in the cloud, or both without giving up control.
ClusterControl empowers you to standardize daily lifecycle database operations and deploy, monitor, manage, and scale without constantly tweaking customized processes or learning new technologies, eliminating unnecessary risk.
Full-lifecycle operations for the most advanced databases


CLUSTERCONTROL FEATURES
12 Operations, 1 Platform
ClusterControl gives you the full experience of a DBaaS in any environment.
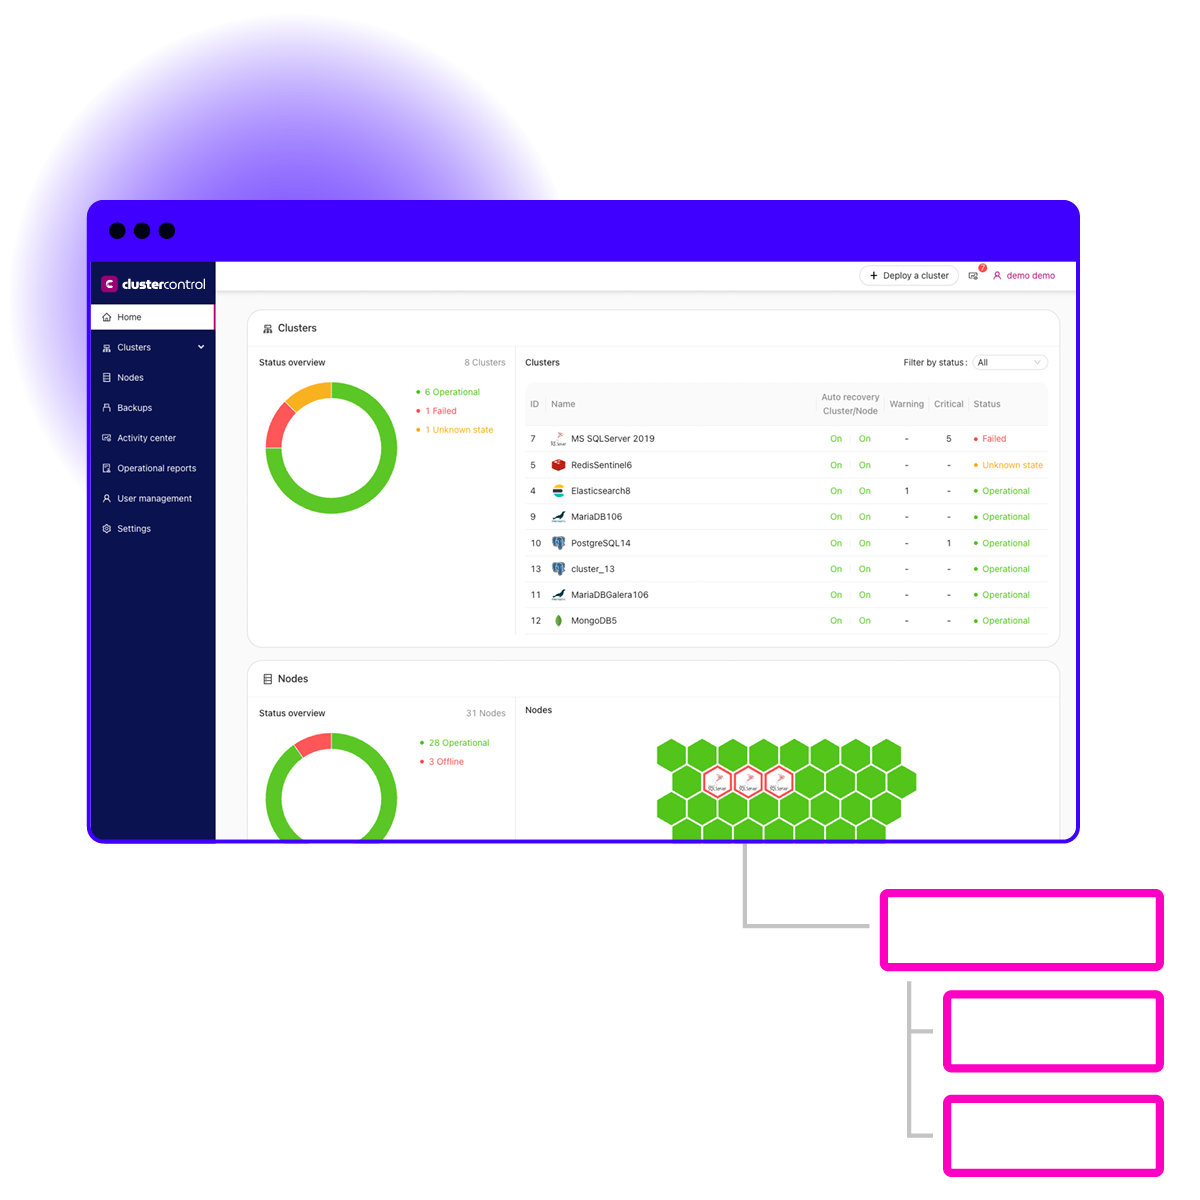
Perform hybrid ops
ClusterControl enables you to operate your databases in any environment from one pane of glass.
Deploy
Launch high availability clusters and load balancers with one click of a button.
Secure
Minimize your maintenance overhead with automated updates and patches.
Backup
Ensure data integrity with automated, verified backups and point-in-time recovery.
Scale
Simply scale your cluster according to your needs.
Failover
Rely on ClusterControl’s automated failover technology to ensure high availability with zero downtime.
Observe
Monitoring your database infrastructure with customizable dashboards and real-time alerting.
Integrate
ClusterControl integrates with popular tools so you can easily snap it into your workflows.
Upgrade
Minimize your maintenance overhead with automated updates and patches.
Manage
Managing your database configurations and performance is easy with battle-tested, editable templates and granular monitoring features.
Report
ClusterControl provides you with comprehensive operational reports on the health and stability of your database operations.
DevOps tools
Our CLI, API, GUI, and Terraform provider make it easy to work ClusterControl into your preferred workflow.

We’ve reduced MySQL cluster deployment times by 98% with ClusterControl, and improved DBA productivity while lowering costs by automating database management tasks.
Werner Van Driessche
System Admin, Technicolor
Try ClusterControl free for 30 days?
Database features
| MySQL | MySQL Galera | PostgreSQL | Timescale | SQL Server on Linux | Elasticsearch | MongoDB | Redis | |
| LICENSES | ||||||||
| Open-source binaries | ||||||||
| Enterprise License | ||||||||
| BACKUP & RESTORE | ||||||||
| Full | ||||||||
| Incremental | ||||||||
| Partial | ||||||||
| Restore: PITR | ||||||||
| Clone / Duplicate node | ||||||||
| Local storage | ||||||||
| Cloud storage | ||||||||
| Encryption | ||||||||
| Compression | ||||||||
| CLUSTER CREATION | ||||||||
| Failover | ||||||||
| Asynchronous replication | ||||||||
| Synchronous replication | ||||||||
| Add node / decomission | ||||||||
| SSL/TLS connectivity | ||||||||
| Load Balancer availablity | ||||||||
| Infrastructure manageability | ||||||||
| SECURITY SUMMARY | ||||||||
| User console access | ||||||||
| Key management | ||||||||
| LDAP integration | ||||||||
| Audit log | ||||||||
| PERFORMANCE ANALYSIS | ||||||||
| Query monitoring | ||||||||
| Operations monitoring | ||||||||
| Custom metrics / thresholds | ||||||||
| Replication lag | ||||||||
| Configuration management | ||||||||
| Database-specific dashboard | ||||||||
| Alarms & error reporting |
What ClusterControl license fits me?
Community
For deployment and monitoring
- Deployment and monitoring
- Performance advisors
- Community support
starts atFree
Advanced
For production deployments
- Scaling and failover
- Deploy load balancers
- Business hours support
for pricingContact Us
Enterprise
For enterprise-grade deployments
- Enhanced security features
- Reports (health, capacity, etc.)
- 24×7 support
for pricingContact Us
Can I install ClusterControl on an Ubuntu VM even though my organizations standard is another Linux?
Yes. Install on any linux distribution wherever is convenient, on-premise or in the cloud.
Do I have to create a VM for ClusterControl?
You can also use docker and our docker image if that’s easier. It will depend obviously on how many databases and clusters you will end up controlling.
When I import a production database into the console what happens?
You add ssh credentials in order to connect to the server (on-prem or cloud) and add the IP and port and user/password. That’s it. ClusterControl doesn’t touch any installations and just gets the replication or cluster environment under control by sending alerts and events that you can act upon accordingly.